Using Object Buffers
Using Object Buffers/Depth Mattes in Cinema 4D and After Effects.
The use of Object Buffers in Maxon’s Cinema 4D or any 3D Package is Crucial to proper Compositing within After Effects. Click here to purchase Cinema 4D 14 with a discount! Click here for free C4D Files from the embedded project.
Every Geometry in Cinema 4D whether a Primitive, Clone or Mesh can be easily exported to After Effects as a Silhouette / Matte. Additionally, Reflections, Shadows, Lights, Depth, Transparency etc can also be exported as a Matte.
Mattes are usually Grayscale images or image sequences that are important for adjusting and fine tuning a final sequence or a frame. They contain colored values when exporting Motion Vectors, Reflection, Normal Passes, RGBA and a few others.
Today we are going to talk about the basic matte types, Object buffers and Depth Passes.
An Object Buffer is Always Greyscale, it’s used as a Luma Matte within After Effects to Separate an Object from the rest of it’s scene.
To do so, the easiest way is to duplicate an image sequence and change its mode to Luma matte. The Layer above it must be the Object Buffer pass, check out the screenshot.

* you can see that the Luma Matte Layer is Invisible. When applying a “Luma Matte” mode to a layer, it shall automatically change the layer above it to Invisible.
Applying an effect to the duplicated Layer that uses the Matte is a very common practice. Some like to Precompose both Layers (Sequence + Matte) to have less layers within their Main Composition. Then, apply the effect to the Pre comp.
Next comes Depth mattes, these, when done properly, should appear like “Grayscale gradient images” . They contain the Depth values for the entire sequence. These are a must, when using an After Effects Plugin such as Lens Blur.
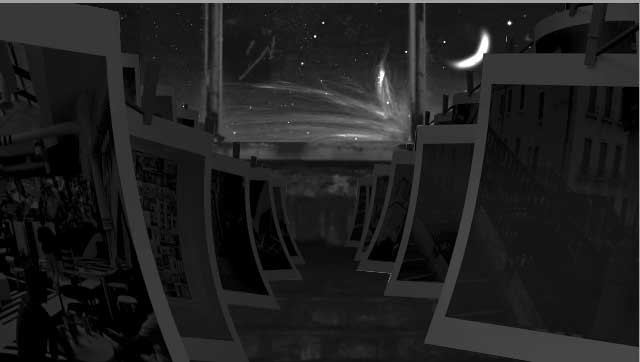
Using a proper Depth map in conjunction with a Lens Blur effect can add a lot of realism to an existing Animation. Check out the Screenshot below to see the potential of a Lens Blur effect.
Without Lens Blur
With Lens Blur
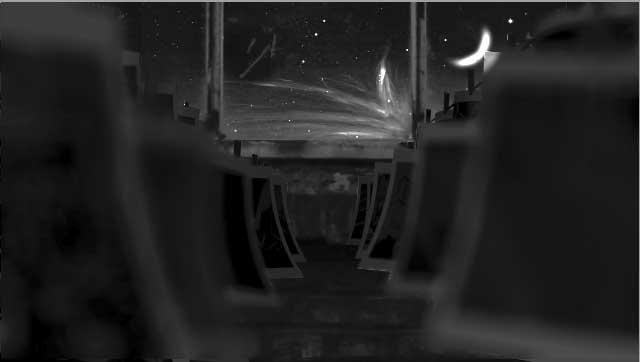
To create a blur the easiest and fastest way is to create an Adjustment layer on top of everything. Then, apply a Lens Blur effect to that layer, and choose the Depth matte layer . It’s within the Camera Lens Blur / Lens Blur settings under “Blur Map” .

** The Blur Radius value within the same effect determines the amount of Blur that will be applied.
To export Object Buffers from Cinema 4D all you have to do is add a “Compositing” tag to your object. Just make sure that the object has no other compositing tags in its hierarchy, if it does, any value will be canceled wherever it’s applied.

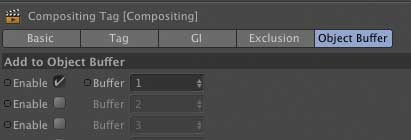
Choose a buffer number for your object, you will re-call that number in the upcoming phase.

Next, Make sure you enable the Multi pass render settings and select a proper file path.
Notice how Group ID: 1 matches the Compositing Tag Number, for each buffer you wish to export you will have to create a corresponding Object Buffer within the Multi pass tab. The Multi pass Tab is within Render Settings, make sure the check all the necessary check boxes.
Creating a Depth Map in Cinema 4D
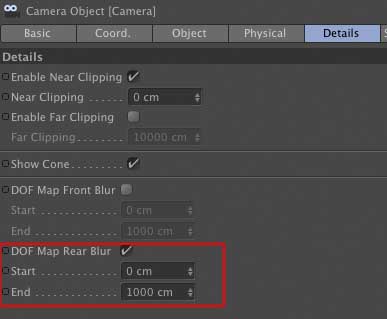
Creating a depth map in C4D is a bit harder than an object buffer, first of all, you have to create a camera and enable it’s depth of field (front,rear, or both, personally, Rear is easier and you can always invert in After Effects to get a front blur. Create a camera and then modify its settings in the Details Tab. (example screenshot)
then, the easiest way to modify the depth would be to use the Editor Camera rather than the new one you’ve just created. When using Editor Camera, switch to Top/Front/Perspective view and manually adjust your Start / End distances. (see the screenshot below)
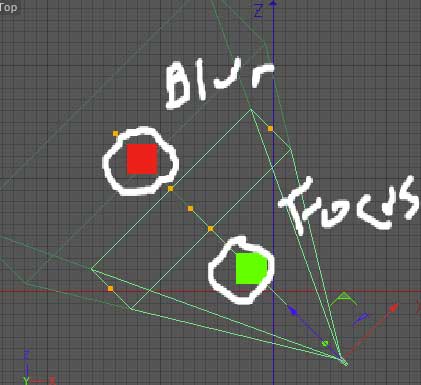
Select the camera and use your mouse to modify the Orange squares to move the distance of the focus.
when you’re done, move to the Render Settings and enable Depth under the Multi pass tab.
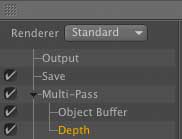
That’s it, you can render your sequence or image and use the Object Buffer and the Depth pass within AE.
Happy comping!
